Wednesday
May122010
The APEX Podcast Ep. 3!!!
The APEX Podcast Ep. 3 with Mike Riley, President of ODTUG. http://bit.ly/a0vuaZ
tagged  APEX
APEX
The APEX Podcast Ep. 3 with Mike Riley, President of ODTUG. http://bit.ly/a0vuaZ
So I was moving a large chunk of javascript into an external file...upon reloading the page I kept seeing syntax errors in the htmldb_Get processes. (firebug, Firefox error console) What is causing this? I asked Scott and we eventually came to the following conclusion:
Original code in external file:
Next, I was asked by Scott "Is javascript PL/SQL??"
thus the following modification needed for all external JS files calling htmldb_Get.
One has to substitute &APP_ID. for $v('pFlowId') in all external JS files outside of the header tags. This will get rid of the syntax error.
Apex templates can be somewhat daunting when we go and look at them in the builder...lots of HTML and tags and bears oh my! So lets look at creating a simple region template that will move us away from table tags and to div tags. WAIT!!! Why would I want to do this? Flexibility...a div structure will give you more control over the elements inside it than a table structure...Now apex will still generate some table structures by default, but we can at least encapsulate a region to start.
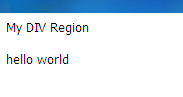
Lets look at the default reports region for theme 20:
hmmm....lets move it to this:
Just a bit better...lets look at it in depth.
First we start with the <table> tags. We can easily move this to a <div> tag that will hold everything within the region. We do this with <div class="region1" id="#REGION_STATIC_ID#">. With the class we can apply stylesheets that will give our div a real personal look and feel. (More on that later) Next we add a div to hold all the header elements. Here we use <div class="topHolder">. Again, we give it a class and in here we pretty much move all the title and button elements.
Next on to the body div. Really simple stuff here...
We use the #BODY# tag inside a div with the class regionBody. So now that we have this lets take a look at it in practice.
Not all that exciting...so lets put a border around the region and have it be 200px in size. The width can either be fluid (using %) or rigid (setting to 200px).
}
Lets also add a bit to the title...maybe underline it and increase the font size, bold.
It now looks like this:
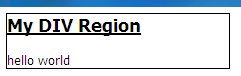
Its getting there...what's next? Anything really. Add a background gradient, pad the body for spacing. Go wild. Don't know CSS? No problem. There are many CSS editors that will help you on your way. (I use CSSEdit for the mac). Ill leave you with an example I did for a client. Again, anything is possible!

On a recent project we ran across a great place to use apex_util.set_session_state and apex_util.json_from_items. A client wanted an email address to self populate after picking a name from a pop-up LOV. Easy enough but how to do this...options options options...well we could have used jQuery but I decided to use APEX_UTIL because of the existing code on the page. So here is what we did..
First, we added an onChange event to the HTML Form Element Attributes of the popup LOV:
Next on to the javascript in the header....
nothing too complex...just calling an APEX onDemand process and passing over a user name. In return we get an email address as JSON.
Last is the onDemand plsql. We use apex_util.set_session_state and apex_util.json_from_items to set the item and pass over the email address.
Now when a user selects from the pop-up LOV, the email address is auto filled into the approver email text field.
Nothing earth shattering here but rather helpful when you want to have values filled in on the page automatically giving that web 2.0 fresh feeling. Also on Chris Beck's blog is a bigger implementation of JSON calls to a apex shuttle.